Go to content

Flap binding

Creating books > Binding

TUTORIAL: Flap binding

In this tutorial you will learn how to create a flap section for a book. A flap section is similar to an advent calendar -it contains flaps that can be lifted up to reveal illustrations or writing.

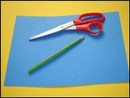
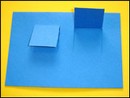
Step 1: What you need


  • single sheet of paper/card

  • scissors

  • glue

  • pencil


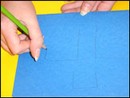
Step 2: Fold the paper


Fold the sheet of paper in two.

Tip: If the book is A4 in size then you will need to fold a sheet of A3 paper to make it fit the book.

Step 3: Design the flaps


Decide where you want the flaps to appear and how big they should be. Use a pencil to trace a rough outline on one side of the folded paper.

Tip: The flaps can be big or small but they can also be shaped differently such as star-shaped or round.

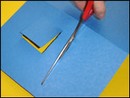
Step 4: Cut along the lines


Cut along the lines you have just drawn.

Step 5: Tying-off


Glue the inside of the folded paper together but be careful not to glue the flaps together.

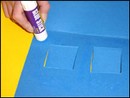
Step 6: The finished product


The flap section is complete and is ready to be decorated. It can be used as a cover for a book or as an interesting insert.

Back to content