TUTORIAL: Pop-up binding |
In this tutorial you will learn how to create a simple pop-up section for a book. The section can then be inserted between the pages of the students' book to create a very colourful and interesting effect. |
Step 1: What you need
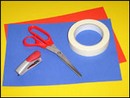
single sheet of paper
cut-outs to "pop-up"
masking tape/glue
scissors
pre-bound book
|
Step 2: Folding the insert
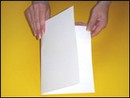
To make the pop-up insert first fold the piece of paper in half
|
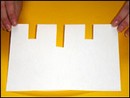
Step 3: Cutting the pop-ups
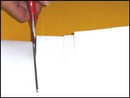
Decide where you want the flaps to appear and how big they should be. Use a pencil to trace a rough outline on one side of the folded paper.
Tip: The flaps can be big or small but they can also be shaped differently such as star-shaped or round. |
Step 4: Folding the tabs
Open the sheet and fold the tabs towards the inside of the sheet
|
Step 5: Fold and crease
When all the tabs have been folded close the piece of paper (with the tabs inside) and crease the edges of the tabs. |
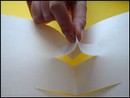
Step 6: Popping-up the book
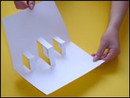
When the sheet of paper is opened the tabs will pop-up. flap section is complete and is ready to be decorated. It can be used as a cover for a book or as an interesting insert. |
Step 7: Adding the cut-outs

Stick/staple cut-outs to each of the folded tabs to create the pop-ups.
Tip: Make sure that the cut-outs are not bigger than the folded sheet so that the pop-ups do not stick out over the edge of the book. |
Step 8: The finished product
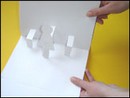
To complete the book place the pop-up section between the pages of the students' book and glue/staple the sides to the pages of the book.
|

