Step 1: What you need

2 sheets of card
paper
scissors
masking tape
stapler
marker
|
Step 2: Folding the insert
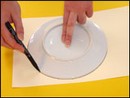
First of all you must decide on a shape for your cover. In this example we are creating a football shaped cover so we draw the shape using a marker.
Tip: Draw your design about an inch from the edge of the page so that there is enough space left to bind the cover. |
Step 3: Collect the book
Once the cover has been designed place the story between a sheet of card (the back cover) and the cover which we have just designed. |
Step 4: Bind the book
Bind the book in the usual fashion (click here to view a tutorial on making a simple binding) |
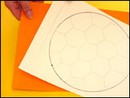
Step 5: Cut out the design

When the book has been bound you can now cut around the shape you have drawn and then decorate the cover. |
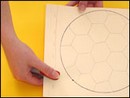
Step 6: The finished product

The cover is now complete.
Tip: You can create more elaborate desgns by following this method but remember to leave space for a hinge, otherwise the book will not stay together for long. |

